









































 SWEDEN / SEK
SOLAR GARD® · INSTALLATION GUIDE
Professional pre-cut window film
Professional window film has a permanent adhesive and provides excellent optical clarity when installed correctly. The film can be adjusted while the glass and adhesive side are thoroughly wet, but it is not removable or reusable.
Read the entire guide before you begin. Thorough cleaning, the correct installation solution and controlled heat forming are essential for a professional result.

Important before you begin
The film is always installed on the inside of the glass. Curved windows must be heat formed on the outside while the release liner is still in place. Work in a clean, dust-free space out of direct sunlight, preferably at around +20 °C. Do not install below +15 °C or above +30 °C.
QUICK GUIDE
Installation in five steps
Check
Check the fit and heat form curved windows when required.
Clean
Thoroughly clean the glass, seals and surrounding panels.
Remove the liner
Spray the adhesive side as the release liner is peeled away.
Install
Position the film and squeegee out the solution using overlapping strokes.
Allow to dry
Allow the film to set for 24–48 hours. Full drying takes 1–4 weeks.
PREPARATION
What you will need
Tools
- Spray bottle
- Professional installation squeegee with a clean, undamaged edge
- Clean microfibre cloths and lint-free paper
- Industrial alcohol or isopropyl alcohol
- Heat gun for curved windows
- Good work lighting
Installation solution
Mix approximately 3–4 ml FilmApp per litre of cold water. Distilled water is recommended, especially in hard-water areas.
Do not use washing-up liquid or any other additives in the installation solution. Do not use hot tap water.
Only FilmApp is recommended for optimum performance and to keep the product warranties valid.
Suitable environment
Work indoors or in deep shade, away from wind, dust and direct sunlight. The recommended temperature is approximately +20 °C.
Allow the car, glass and film to reach the same temperature before installation. Protect panels, textiles and electronics from installation solution.
CURVED WINDOWS
Heat form before removing the release liner
Rear windows and other curved glass normally need to be heat formed on the outside. The shape must be complete before the adhesive is exposed and the film is moved to the inside of the glass.
Can be installed without forming – but the result will be affected
The film can be installed on both flat and curved windows. It can be installed on curved glass without heat forming, but creases and lines will normally appear along the film’s outer edges. For a smooth, crease-free result, the film must first be heat formed to match the shape of the glass. Minor fine-tuning and some forming can also be carried out once the film is in place on the inside of the glass, but the main forming should be completed on the outside before the liner is removed.
1. Leave the liner in place
Position the film in the correct orientation on the outside of the glass with the release liner still in place. Check the fit and orientation.
2. Anchor in an H pattern
Anchor the film in a clear H pattern as shown in the video. This directs the excess and fingers towards the top and bottom edges of the window.
3. Shrink gradually
Set the heat gun to approximately 400 °C or higher. This refers to the gun’s setting and outlet-air temperature, not the surface temperature of the film. Heat one small area at a time and normally shape only upwards and downwards, not sideways.
4. Check the shape
The film must lie relaxed and flat across the entire window before it is taken inside the car for installation.
Use controlled heat: Keep the heat gun moving and never overheat the film or glass. A crease that has been pressed or heated into place cannot be repaired. If you are unsure of the technique, contact customer service before removing the liner.
VIDEO · HEAT FORM THE REAR WINDOW
The video shows how to anchor the film in an H pattern and shrink it in a controlled way towards the top and bottom edges before removing the release liner.
STEP BY STEP
Complete installation guide
Wash the car around the windows
The car must be clean both inside and out. Dirt on seals, trim and panels can otherwise enter the adhesive. Clean the work area before unpacking the film.
Check the fit and orientation
Place the film against the outside of the glass with the liner in place. Check which window it belongs to, that it is the correct way round and that the shape matches. The film itself is then installed on the inside.
Heat form and fine-tune if required
Heat form curved windows on the outside before removing the liner. If the vehicle has a sensor, rear-view mirror or replacement glass, for example, a small adjustment may be required. Shine a light from the opposite side and cut only the film, using a suitable tool and very light pressure.
Deep-clean the glass
Wipe the glass with industrial alcohol or isopropyl alcohol. Then spray with FilmApp solution and clean with a glass scraper. Wipe the edges and seals. Repeat until the glass is completely free from grease, dust and particles. Never use methylated spirits or products that leave residue.
Prepare the film on a clean surface
Remove any excess material around the pre-cut piece without damaging the film. A clean, wet pane of glass works well as a work surface. Position the film with the liner facing you and handle it only by the edges.
Remove the liner and spray the adhesive side
Ask an assistant to hold the film if possible. Peel the liner away slowly while spraying the exposed adhesive side generously with FilmApp solution. Never allow the adhesive side to touch clothing, panels, the floor or dry fingers.
Wet the glass and position the film
Spray the inside of the glass generously without soaking panels or electronics. Bring the film inside with the adhesive side facing the glass and avoid contact with surrounding surfaces. Adjust the film while it moves freely on the solution.
Anchor and squeegee out the solution
Spray the surface of the film so that the squeegee glides smoothly. Anchor the centre with one controlled stroke, then work from the centre towards the edges using firm, controlled, overlapping strokes. Never squeegee dry film.
Final-squeegee and inspect from outside
Inspect the window from outside in good light. Look for remaining pockets of solution, air and particles. Spray the surface of the film and immediately squeegee again where required. Check every edge once more.
Allow the film to set
Let the car stand for a few hours and perform a final inspection before it leaves the work area. The film normally takes 24–48 hours to set initially. Full drying usually takes 1–4 weeks depending on temperature, season and humidity.
DOOR WINDOWS
Installation on roll-down windows
The film is normally cut to extend a few millimetres beneath the side seals and approximately 2–4 cm below the lower seal. This reduces the risk of light gaps when the window is raised.
- Lower the window a few centimetres and clean the top edge of the glass as well as the seals.
- Position the top edge of the film a couple of millimetres below the edge of the glass. Anchor and squeegee the upper section.
- Carefully raise the window and tuck the film 2–4 cm beneath the lower rubber seal using plenty of solution.
- For the best result, remove or loosen the lower seal. On some models, the door panel may also need to be removed. Always follow the instructions for the specific vehicle model.
Important: Do not operate the window for the first 48 hours or until the film is firmly set at the edges. Cold or damp weather may require more time.
REAR WINDOWS
Installation on fixed and curved windows
Always heat form strongly curved windows on the outside with the liner in place. The film must lie flat before the adhesive side is exposed.
On fixed rear windows, the film is normally cut to extend beyond the transparent area of the glass and slightly onto the black border.
Take care around heater lines and antennas. Never use a knife, razor blade or other sharp tool against the inside of the glass.
DOT MATRIX & EDGES
Neater edges with TintGel™
The “dot matrix” is the area of raised black dots or lines around the edge of the glass. Because the surface is not completely flat, the film may struggle to make full contact between the dots. Results vary between vehicle models and glass types.
Clean the area thoroughly with industrial alcohol and a clean, slightly coarser washing sponge. Never sand the dots on the glass; this can cause scratches and create dust. For a more even edge and improved adhesion, TintGel™ Dot Matrix Fix can be used.
1. Clean
Carefully remove dirt, grease and residue from the dots and black border.
2. Apply
Follow the TintGel™ instructions and apply a thin, even layer to the area to be treated.
3. Inspect again
Once the film has dried fully, the glass can, if necessary, be warmed very carefully from the outside while the edge is pressed from the inside.
DRYING TIME & AFTERCARE
After installation
The first 24–48 hours
Allow the film to set undisturbed. Roll-down windows must remain closed until the edges are firmly set.
Full drying time
Allow approximately 1–4 weeks depending on temperature, sunlight, season and humidity.
Cleaning
Wait until the film has set. Then use a soft cloth and a mild, ammonia-free cleaner.
After the first thorough inspection, normal sunlight and warmth can help the drying process. Recheck roll-down windows and edges before returning the vehicle to normal use.
TROUBLESHOOTING
Common problems and solutions
Large pockets of solution remain
Spray the surface of the film and squeegee again while the installation is still fresh. Work from the pocket towards the nearest edge using overlapping strokes.
Bubbles remain after drying
Dust, dirt, mineral deposits or welding spatter on the glass from an earlier repair may be the cause. Carefully feel the glass before installation.
An edge will not stay down
Common causes include dirt at the edge, remaining solution or insufficient heat forming. Clean and squeegee again, and use TintGel™ on the dot matrix where appropriate.
The film has developed a crease
A sharp crease or damaged adhesive side usually cannot be repaired. Carefully remove the film and use a new pre-cut piece.
The positioning is incorrect
Lift and adjust only while the film and glass are thoroughly wet. If the adhesive has started to bond or has become contaminated, replace the film.
The film lifts on a curved window
Check that the film has been heat formed correctly. On a fresh installation, the glass can be warmed carefully from the outside while the film is pressed from the inside. Stop if the film or glass becomes too hot.
WE ARE HERE TO HELP
Need advice during installation?
Send us a clear photo of the glass and film together with the vehicle model and registration number. This helps us assess the fit, heat forming or an edge that needs extra attention more quickly.
Chat is open Mon–Sun, 09:00–21:00.
Products mentioned on page
-
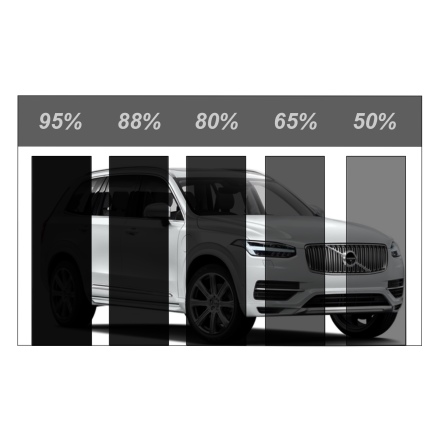 Summer sale 15-50%!from 195 SEK(Ordinary price: 349 SEK)
 -
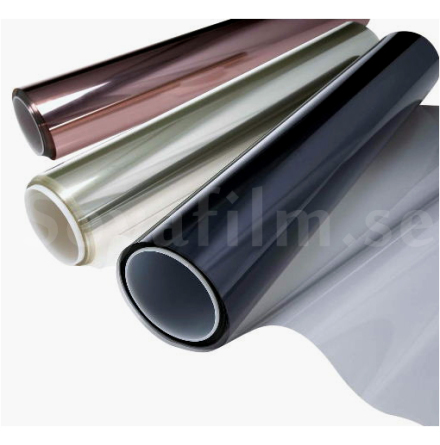 Summer sale 15-50%!235 SEK(Ordinary price: 313 SEK)Earlier lowest price: 235 SEK
 -
Summer sale 15-50%!4 399 SEK(Ordinary price: 5 499 SEK)
-
Summer sale 15-50%!5 279 SEK(Ordinary price: 6 599 SEK)
-
Summer sale 15-50%!6 159 SEK(Ordinary price: 7 699 SEK)
-
Summer sale 15-50%!4 537 SEK(Ordinary price: 6 049 SEK)
-
Summer sale 15-50%!6 352 SEK(Ordinary price: 8 469 SEK)


